Edit Files with GitHub
TLDR
- See if
gitis installed (Usually ships on Mac)git version- Not installed? https://github.com/git-guides/install-git
- Initialize the Git directory on local machine
- Make the directory
mkdirnamedvuebookin the/Users/username/vuebook - Change Directory
cdinto~/vuebook
mkdir ~/vuebook22 cd ~/vuebook22 - Make the directory
- Initialize it as a git directory
git init . - Set the
remoteGitHub repository URLadda newremotealias- Give it the alias (nickname)
vuemain - Target the url
https://github.com/eshimab/vuebook
git remote add vuemain https://github.com/eshimab/vuebook pulla copy of the files- Use the
vuemainalias to point to the GitHub URL - Select the
mainbranch (for our use case)
git pull vuemain main- Use the
Ignore Files
- You must setup a
.gitignorefile in the root directory so thatgitdoes not backup large files or directories. eshimab/vuebookrepo contains a.gitignorefile that should be downloaded during your firstpull- In the
.gitignorefile, you use#for comments - The filepaths are relative to the root
gitdirectory, in this casevuebook - End a directory with
/to recursively ignore everything in that directory - On MacOS, most folders have a hidden file
.DS_Storethat is a record keeping file.- Ignore these files because they will cause conflicts.
- Ensure that in
~/vuebook/.gitignoreyou have:
# ------------------ Directories
# npm / pnpm installed modules
/node_modules/
# Temp Directories for VuePress local server
/docs/.vuepress/.cache/
/docs/.vuepress/.temp/
# VuePress Build Distribution
/docs/.vuepress/dist/
# oversized assets
/oversized-assets/
# ------------------ Files
*.DS_Store
gitignore Syntax
# Ignore all files with .txt extension
*.txt
# Ignore all files in the "logs" directory
/logs/
# Exception: Include "important.txt" even though it has .txt extension
!important.txt
# Exception: Include everything in the "logs" directory
!/logs/*
Long Way
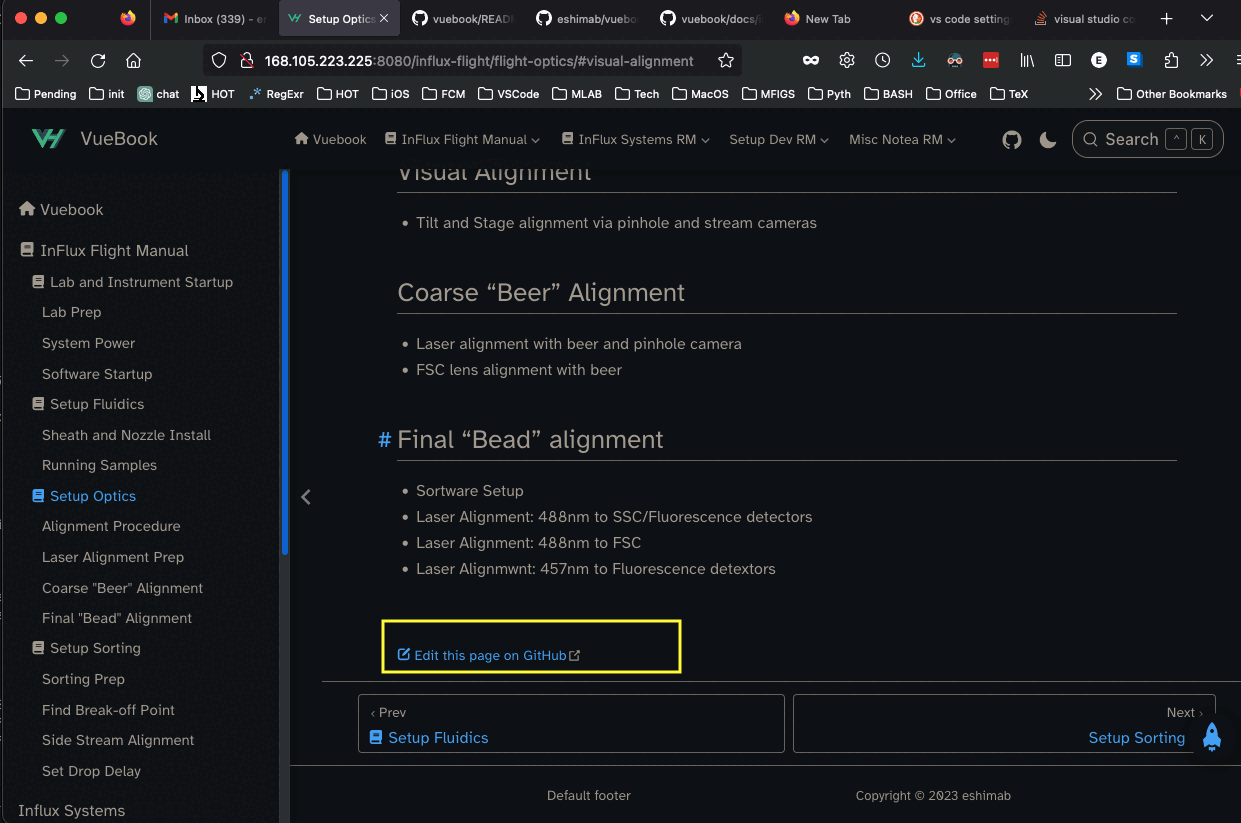
On almost every page of the VueBook website, you can click the Edit This Page On GitHub link on the bottom of the page.

You could also just go to the github website:
https://github.com/eshimab/vuebook
Now you're on the GitHub page. Click the side menu button
::: figure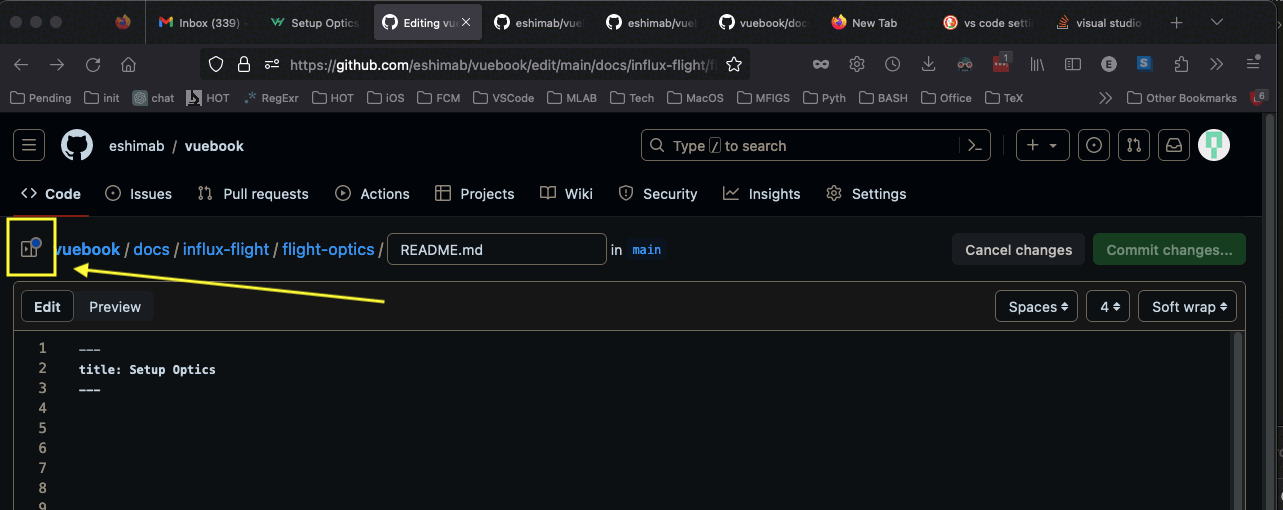
Caption
:::
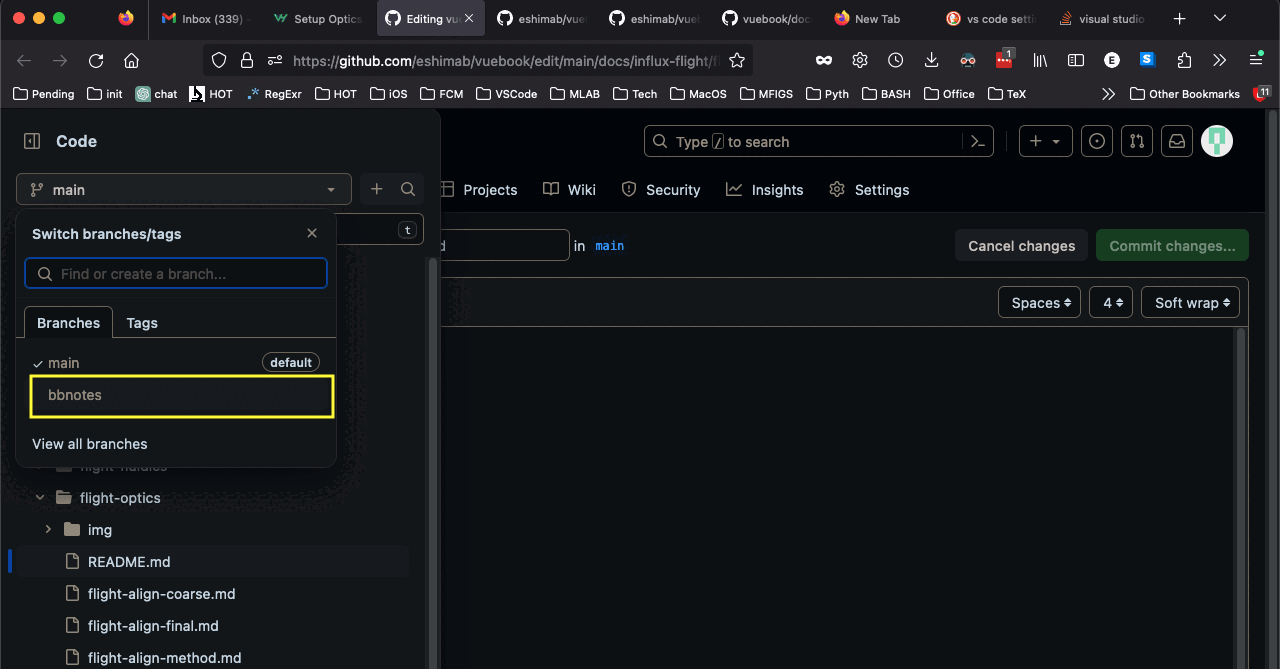
Use the dropdown menu below Code on the sidebar. If the main branch is checked off, use the drop-down to select the branch bbnotes.
Using a branch prevents changes from breaking website because it only loads files from the main branch.
Editing Files
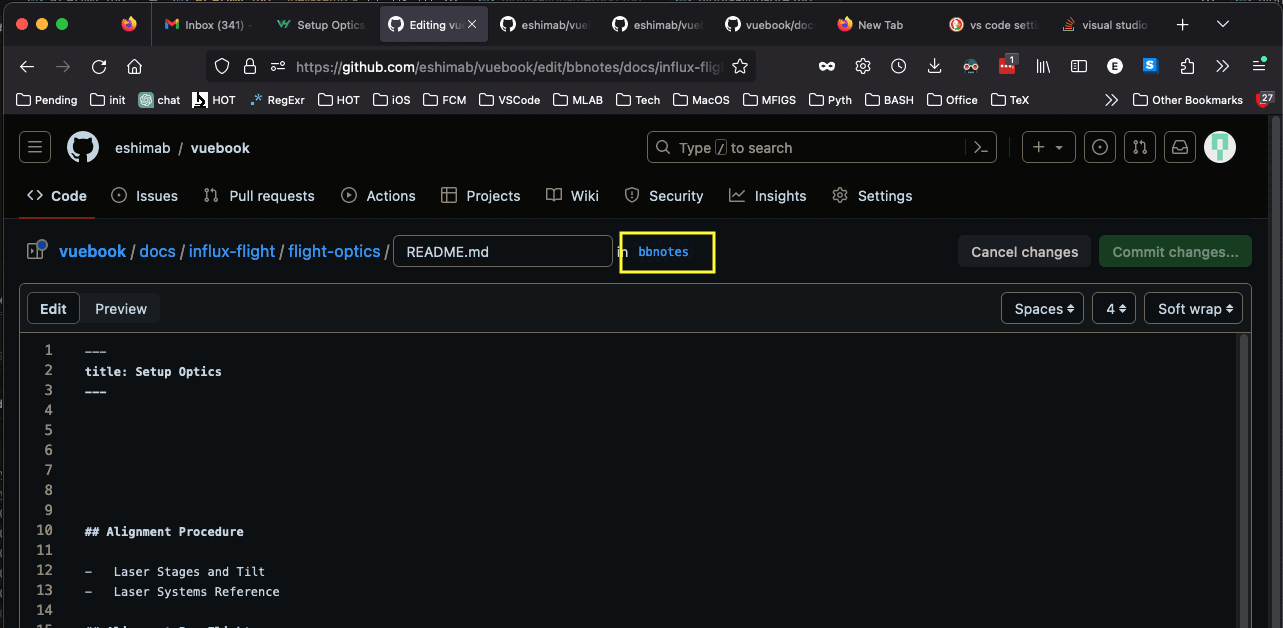
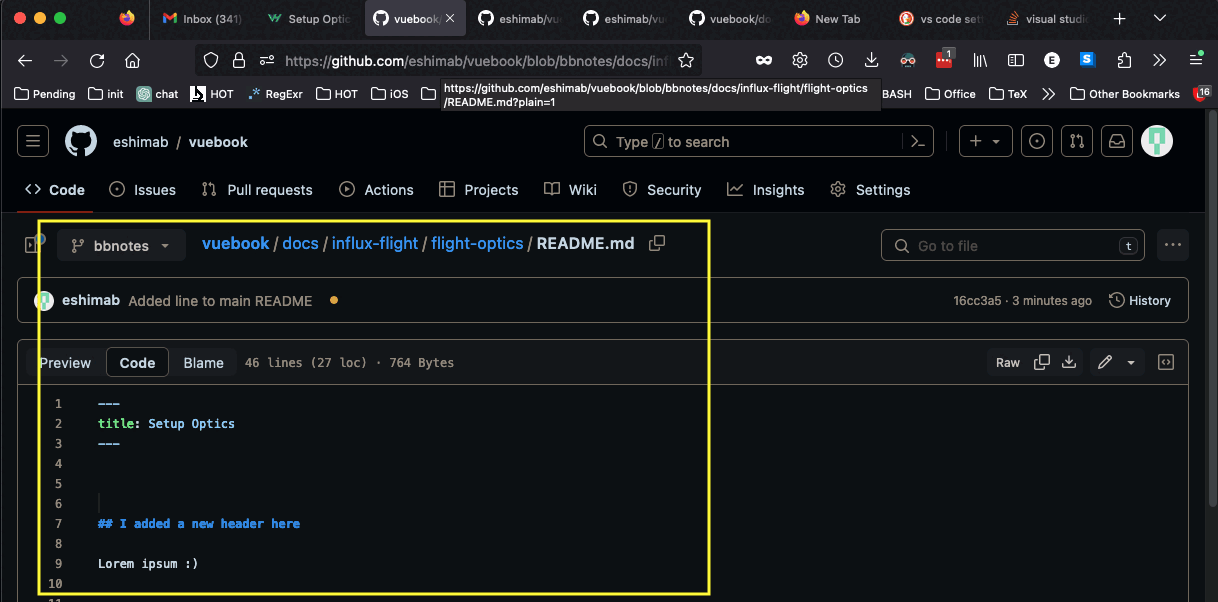
Now you should be able to edit the file, and the filepath above the text editor should display the bbnotes branch:
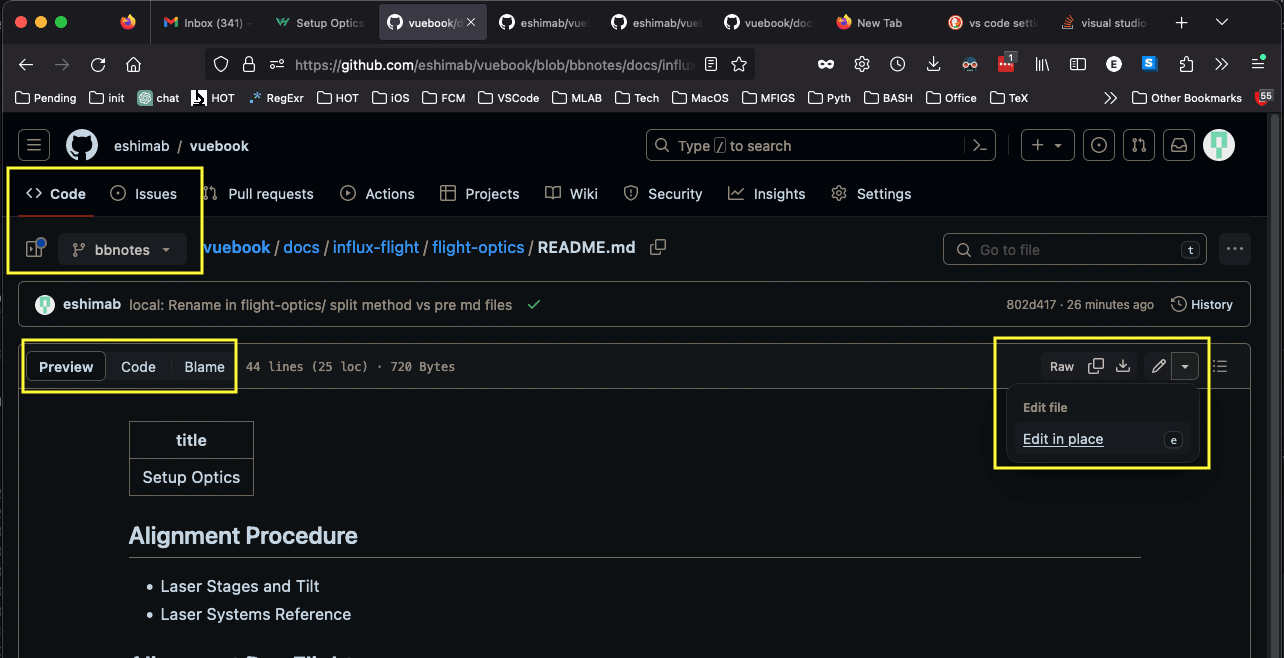
If you accidentally leave the text editor, make sure that you are viewing the Code tab, and have the branch set to bbnotes. use the dropdown in the top right corner to edit the file.
Alternatively, you can click the Code button in the top left of the text editor window. You can see what the rendered content will look like in the Preview pane.
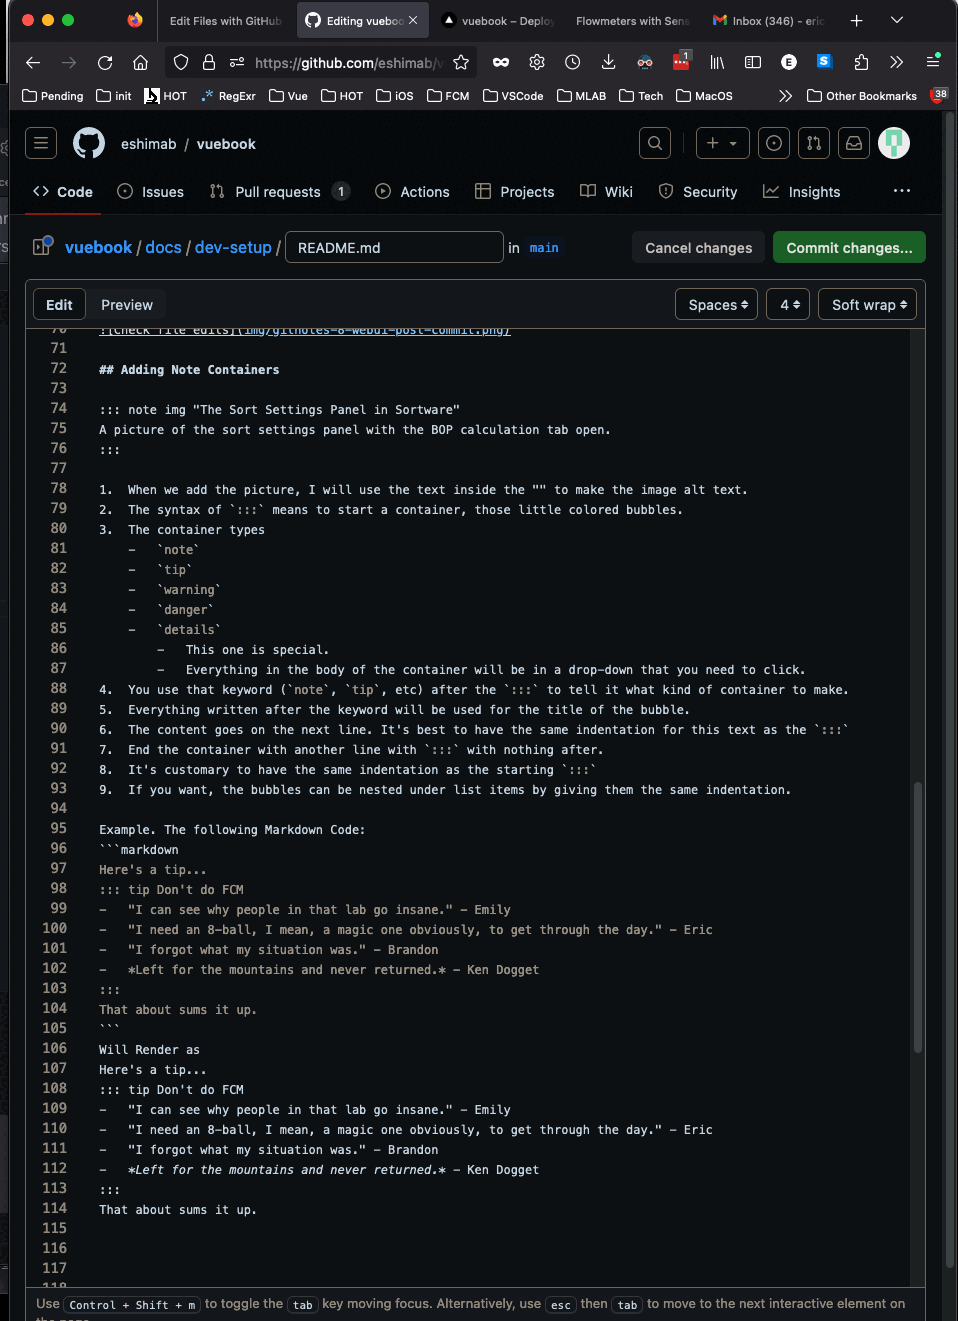
Edit the file using the text editor. You can type enumerated lists using "lazy numbers" because MarkDown till automatically number list items
Numbered List ( Software Will automatically fix numbers)
1.  Item 1
2.  two Spaces after period
3.  Typed numbers don't really matter

-   Bullet List
-   Three spaces after dash
Edit the file with the text editor. If you would like to save the work, then press Commit changes... otherwise, press Cancel changes to permanently erase your edits.
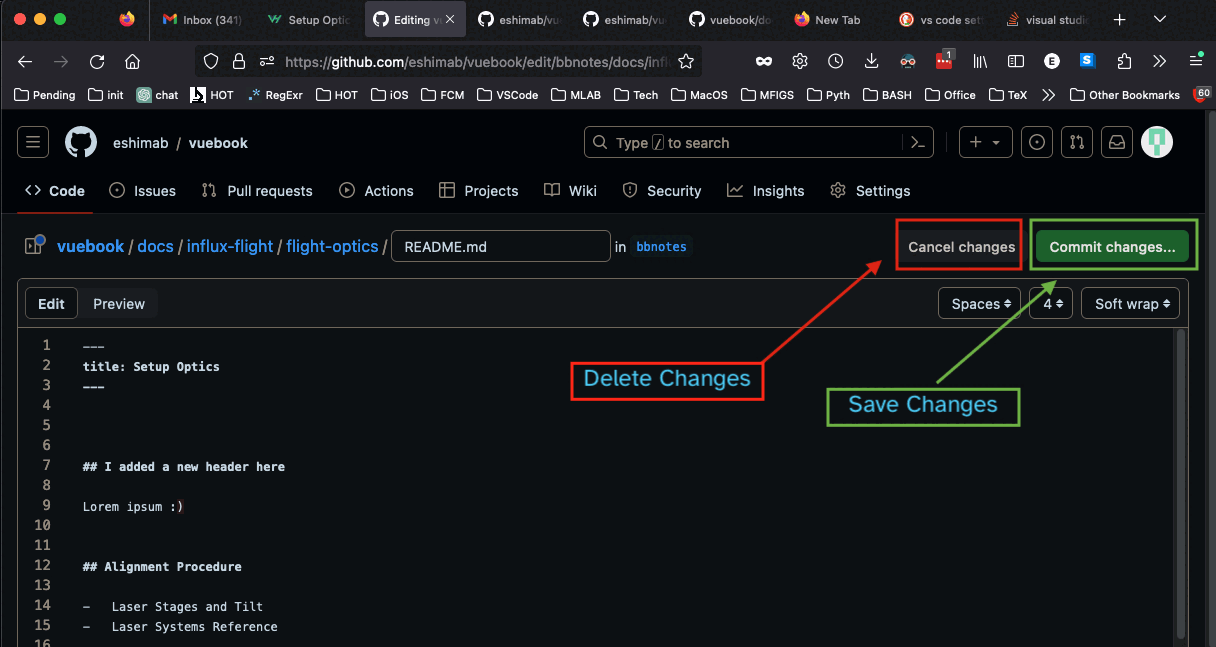
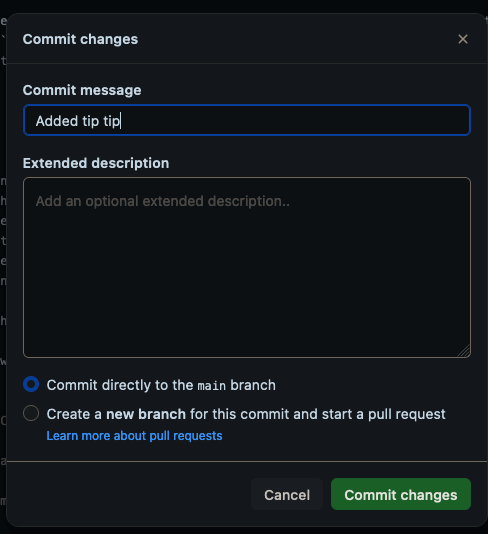
Save Changes with "Commit"
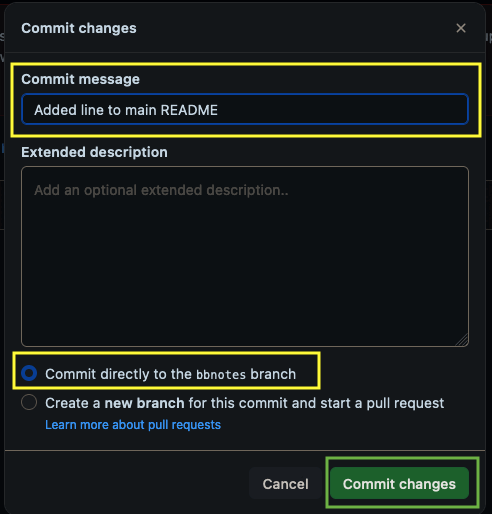
To save your work, click the Commit changes... button. It will open up a Commit changes window. A Commit message is required, you can leave the Extended description blank if you want.
- Ensure that "Commit directly to the
bbnotesbranch" is Checked - Click the green
Commit changesbutton
You may need to refresh your browser to see the edits. Note that if you are not set the bbnotes branch, the edits will not appear.
Markdown Reference Links
- Reference Links can be defined anywhere in the document
- The link definitions won't be rendered.
- Use the
[link-id]in text to link to the reference link - Note that Markdown Comments are placed between
<!-- Comment Text -->
<!-- Reference Link Creation (anywhere in document) -->
[link-id]: ./relative/link/file.md "Optional Link Text"

<!-- Somewhere in the document -->
And then in text you can call the link with [Link Text][link-id] to create a hyperlink.
Adding Images for Later
I use this to make it obvious we need a picture here.
::: note asset "The Sort Settings Panel in Sortware"
A picture of the sort settings panel with the BOP calculation tab open.
:::
When we add the picture, I will use the text inside the "" to make the image alt text.

The ::: note is part of the code syntax. asset indicates that "This is a request for a picture."
Include and Image in Markdown using the following Syntax
Figure Example Goes Here

- Skip a line after the image to center figure and caption.
- The img filepath is relative to this markdown file `flight-begin-meters.md`
That Markdown Code renders as
Figure Example Goes Here
- Skip a line after the image to center figure and caption.
- The img filepath is relative to this markdown file
flight-begin-meters.md
Adding Note Containers
- The syntax of
:::means to start a container, those little colored bubbles. - The container types
notetipwarningdangerdetails- This one is special.
- Everything in the body of the container will be in a drop-down that you need to click.
- You use that keyword (
note,tip, etc) after the:::to tell it what kind of container to make. - Everything written after the keyword will be used for the title of the bubble.
- The content goes on the next line. It's best to have the same indentation for this text as the
::: - End the container with another line with
:::with nothing after. - It's customary to have the same indentation as the starting
::: - If you want, the bubbles can be nested under list items by giving them the same indentation.
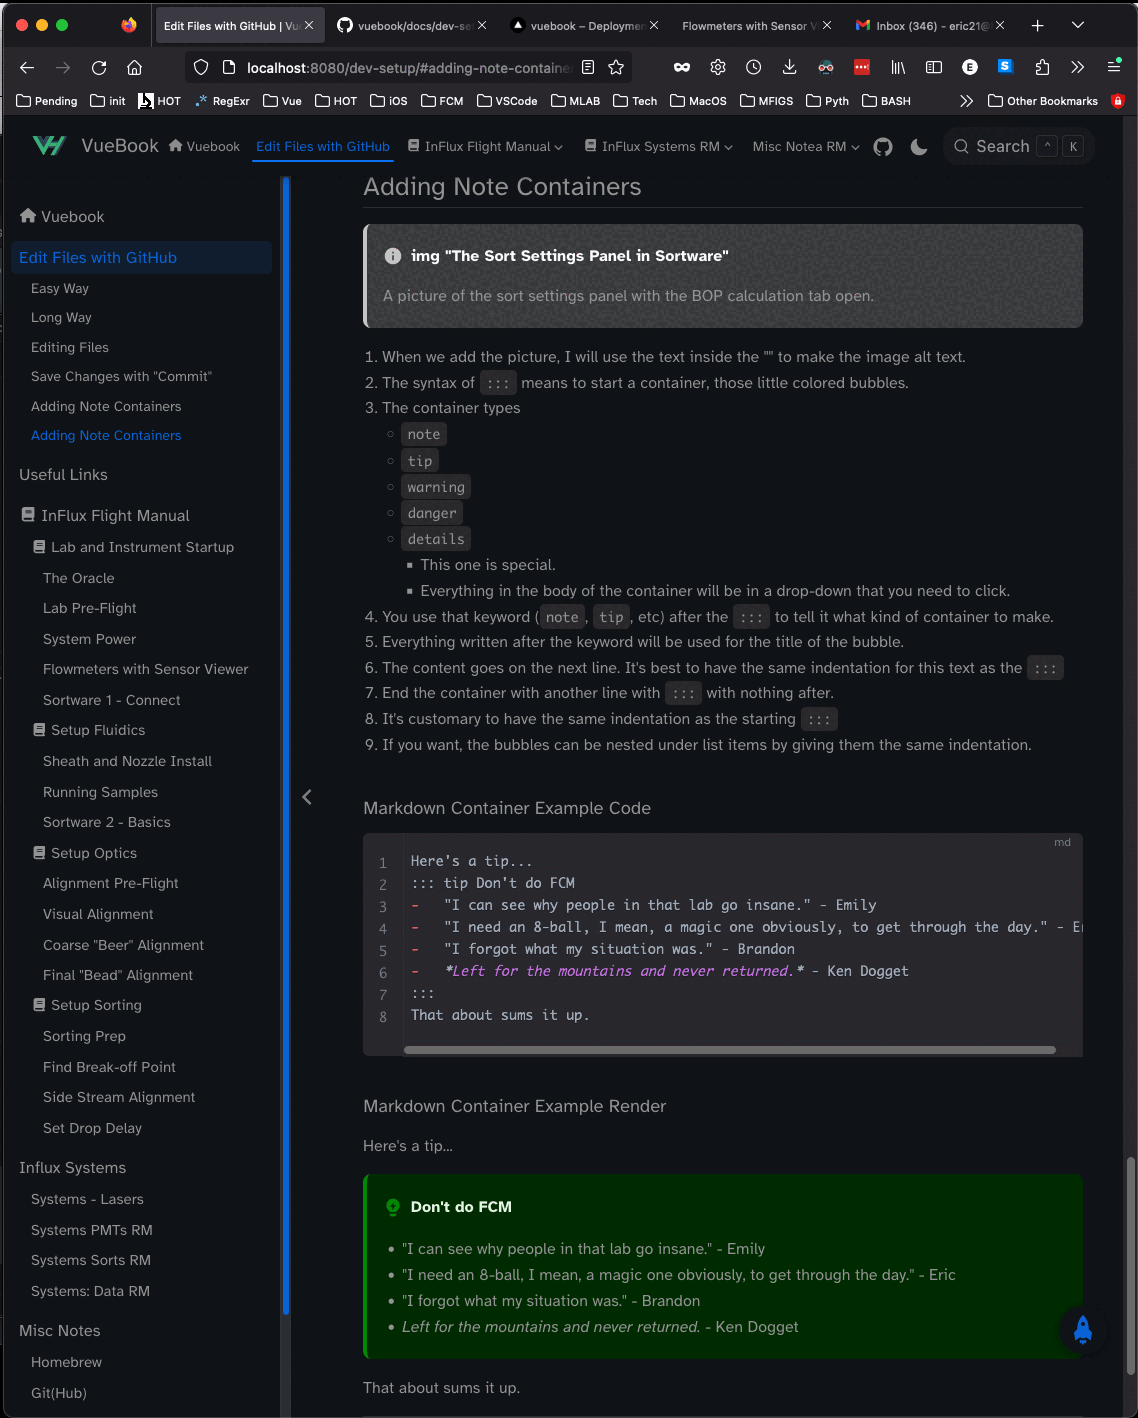
Note Container Example
An example for the Markdown syntax for creating a note container.
- Note Container Markdown is what you type in your
markdownfile.mdtext file - Note Container Render is that is on the website
Note Container Markdown
Here's a tip...
::: tip Don't do FCM
-   "I can see why people in that lab go insane." - Emily
-   "I need an 8-ball, I mean, a magic one obviously, to get through the day." - Eric
-   "I forgot what my situation was." - Brandon
-   *Left for the mountains and never returned.* - Ken Dogget
:::
That about sums it up.
Note Container Render
Here's a tip...
Don't do FCM
- "I can see why people in that lab go insane." - Emily
- "I need an 8-ball, I mean, a magic one obviously, to get through the day." - Eric
- "I forgot what my situation was." - Brandon
- Left for the mountains and never returned. - Ken Dogget
That about sums it up.
Nesting Containers
- If nesting the custom containers,
- Outer container uses 4 colons
:::: - Inner container uses the standard 3
:::
- Outer container uses 4 colons
- Indentation of the inner container is optional
- If you chose to indent, then do so with only 2 spaces
This syntax also works for nesting fenced code blocks!
- Start code block with 4x backtick: ````markdown
- End Code block with 4x backtick
- See Markdown of the next section for an example
Nested Container Example Markdown
:::: tip Outer Container has 4 colons
Outer container text Can be indented by 0-2 spaces without effect
::: note Inner Container has 3 colon and no Indentation
-   You don't have to indent the inner container
:::
Outer container text continues here
::::

:::: tip Outer Container has 4 colons
  Outer container text Can be indented by 0-2 spaces without effect
  ::: note Inner Container has 3 colons and 2 space Indentation
  -   Inner container indentation is only 2 spaces.
  -   Even though list items often use 4
  :::
  Outer container text Can be indented by 2 spaces
::::

:::: tip Outer Container has 4 colons
    Outer container text with 4 space indent is code
    ::: note Inner Container has 3 colons and 4 space Indentation
    -   Inner container has 4 space indentation
    -   It is rendered as a verbose code block
    :::
  Outer container text with 0-2 space indent is normal
::::

:::: tip Outer Container has 4 colons
  Here is a fenced code block (superior to using the 4 space method)
  ```markdown
  Outer container text with 2 space indent
  ::: note Inner Container has 3 colons and 4 space Indentation
  -   Inner container has 4 space indentation
  -   It is rendered as a fenced code block
  :::
  ```
  Outer container text with 0-2 space indent is normal
::::
Nested Container Example Render
Outer Container has 4 colons
Outer container text Can be indented by 0-2 spaces without effect
Inner Container has 3 colon and no Indentation
- You don't have to indent the inner container
Outer container text continues here
Outer Container has 4 colons
Outer container text Can be indented by 0-2 spaces without effect
Inner Container has 3 colons and 2 space Indentation
- Inner container indentation is only 2 spaces.
- Even though list items often use 4
Outer container text Can be indented by 2 spaces
Outer Container has 4 colons
Outer container text with 4 space indent is code
::: note Inner Container has 3 colons and 4 space Indentation
-   Inner container has 4 space indentation
-   It is rendered as a verbose code block
:::
Outer container text with 0-2 space indent is normal
Outer Container has 4 colons
Here is a fenced code block (superior to using the 4 space method)
Outer container text with 2 space indent
::: note Inner Container has 3 colons and 4 space Indentation
-   Inner container has 4 space indentation
-   It is rendered as a fenced code block
:::
Outer container text with 0-2 space indent is normal
Using GitHub Example
Edit File using GitHub UI
Commit those changes to save the edits
Behold your beautiful work
GitHub will not render the containers
There are many Markdown extensions, this is one of them.
VueBook will render the containers.
Just commit edits to the main branch and the website will render them.